7 CNC Router Bits Every Sign Shop Should Have
Table of Contents
- TL;DR — What to Buy First
- If You Do X → You NEED This Bit
- 1) V-Bits (60° / 90°) — Lettering & V-Carving
- 2) Ball Nose Bits — 3D Carving & Relief Work
- 3) Downcut Spiral Bits — Clean Top Edges
- 4) Upcut Spiral Bits — Roughing & Fast Material Removal
- 5) Compression Bits — Laminated Materials
- 6) O-Flute Bits — Acrylic & Plastics
- 7) Engraving Bits — Fine Detail
- Common Mistakes (Wrong Bit = Bad Results)
- Upgrade Path — Starter → Pro
- How to Choose the Best Bit for Your Shop
- Final Thoughts
- FAQs
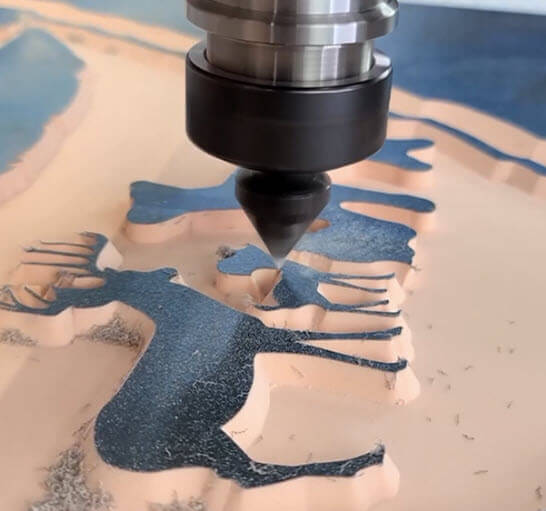
If you run a CNC sign shop—or want to start producing cleaner, more professional signs—your bit selection matters more than most beginners realize. The wrong bit can leave chipped edges, fuzzy lettering, melted plastics, or slow cycle times. The right bit helps you cut cleaner, finish faster, and say yes to more kinds of sign work.
In today’s sign industry, CNC isn’t optional—it’s the backbone of how most shops produce clean, repeatable work. From carved wood signs to acrylic lettering, the difference between “good enough” and professional results often comes down to one thing: using the right router bit for the job.
This guide covers seven CNC router bit types that do the bulk of signmaking work: lettering, profile cutting, 3D carving, laminated sheet goods, acrylics, and fine detail. For each one, we’ll cover what it is, why it matters in signmaking, and how to choose the best bit for your shop.
TL;DR — What to Buy First
If you’re just getting started, you do not need every specialty bit on day one. A smart starter kit should cover the jobs sign shops do most often: lettering, profile cutting, and clean edge quality on common materials.
What to buy first
- 90° V-bit for larger lettering and general V-carving
- 60° V-bit for smaller text and finer detail
- Downcut spiral for clean top edges in wood, MDF, and sign faces
- Compression bit if you cut laminated materials regularly
If you also make acrylic or plastic signs, add an O-flute bit. If you do carved dimensional signs, add a ball nose bit. If you produce a lot of small text, logos, or intricate detail, add an engraving bit.
A simple starter-to-growth path
- Starter: 90° V-bit, 60° V-bit, downcut spiral
- Working shop: add compression bit and O-flute
- Advanced / premium output: add ball nose and engraving bits
That mix will cover most common sign jobs without forcing you to overbuy too early.
If You Do X → You NEED This Bit
Not sure what to buy first? Start with the type of signs you actually make.
- You cut letters and decorative grooves in wood or HDU → You need V-bits
- You carve 3D relief signs, textures, or sculpted surfaces → You need ball nose bits
- You want clean top edges on plywood, veneered panels, MDF, or painted sign faces → You need a downcut spiral
- You rough out shapes quickly or cut deeper pockets → You need an upcut spiral
- You cut laminated board, melamine, plywood with clean faces on both sides, or sign panels with finished surfaces → You need a compression bit
- You cut acrylic, PVC, or plastic sign materials → You need an O-flute bit
- You engrave small lettering, fine logos, serial details, or intricate linework → You need an engraving bit
Most shops don’t need every bit for every job. The key is matching the bit geometry to the material, the finish quality you want, and the kind of sign work that actually makes you money.
 Amana CNC V-Groove Insert Router Bits provide unique grinding angles to eliminate build up at the V point. Innovative tool design with replaceable, rotatable high grade solid carbide insert knives - allows for harder grades of carbide. Cost effective solution compared to replacing brazed router bits
1) V-Bits (60° / 90°) — Lettering & V-Carving
What it is / what it does
A V-bit has angled cutting edges that create a V-shaped groove. In signmaking, these bits are the go-to choice for carved lettering, borders, decorative details, and classic V-carved signs. As the cutter goes deeper, the cut gets wider—so the same bit can create varied line widths depending on depth.
Why it matters in signmaking
This is one of the defining bit types for carved signs. If you make wood signs, HDU signs, plaques, decorative lettering, or dimensional sign faces, V-bits are essential. They create the crisp, shadow-catching letterforms that give routed signs their traditional carved look.
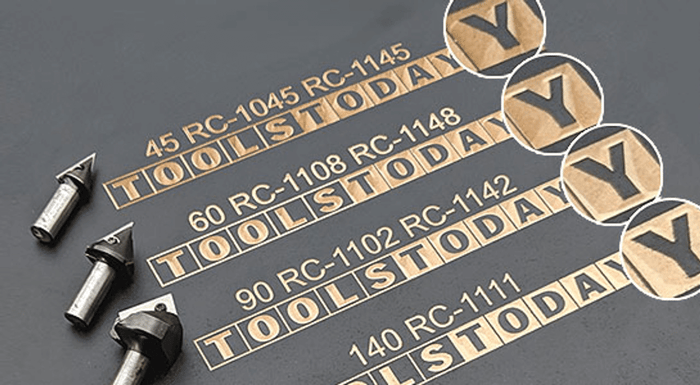
A 90° V-bit is often a strong general-purpose choice for larger lettering and bold designs. A 60° V-bit is usually better for smaller text and more detailed work because it can cut narrower grooves and sharper-looking detail.
How to choose the best one for you
- Choose 90° for larger lettering, bold grooves, and more general-purpose V-carving
- Choose 60° for smaller text, tighter detail, and finer linework
- Look at the tip quality and sharpness, especially if letter quality matters
- Match the bit size to your machine’s rigidity and the scale of your typical sign work
If your shop does mostly bold, readable signage, a 90° bit may be your first buy. If you often carve finer fonts or smaller details, a 60° bit may earn its keep quickly. Many shops benefit from having both.
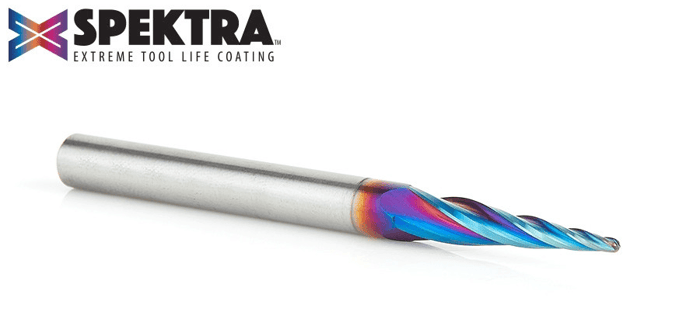 Amana Tool 46282-K CNC Spektra 2D/3D Carving 5.4 Deg Tapered Angle Ball Nose Specially designed for 2D and 3D CNC profiling and carving in plastic & wood with CNC machines. The high-shear ball nose tips cut smooth 2D and 3D contours with reduced stepping, while the proprietary Spektra™ coating provides high resistance to wear.
2) Ball Nose Bits — 3D Carving & Relief Work
What it is / what it does
A ball nose bit has a rounded tip instead of a flat one. That rounded end helps it create smooth contours, flowing shapes, and sculpted surfaces. It is commonly used for 3D carving, relief carving, texturing, and finishing passes on dimensional signs.
Why it matters in signmaking
If your sign work goes beyond flat letters and cutouts, ball nose bits open the door to more premium work. They are especially useful for carved emblems, topographic effects, routed backgrounds, raised designs, and decorative dimensional signage. They can also improve surface finish on 3D contours compared to using a flat end mill.
How to choose the best one for you
- Use smaller diameters for finer detail and tighter contours
- Use larger diameters for faster machining on broad 3D surfaces
- Balance finish quality vs. machining time—smaller bit + tighter stepover usually means better finish but longer run time
- Think about whether it will be used for rough shaping, finishing, or both
If you only do flat signs, a ball nose bit may not be a first purchase. But if you offer dimensional signs, relief carving, or premium custom work, it can become one of your most important tools.
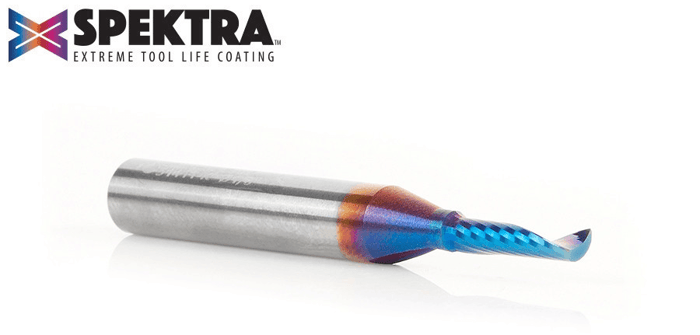
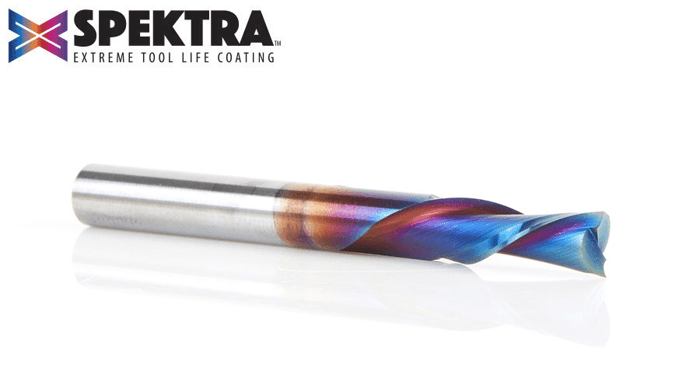 Amana Tool 46202-K Spektra Spiral Plunge Down-Cut Router Bit Spiral-flute bits combine a shearing action (for an especially clean, accurate cut) with an augering action (clears chips from the cut). The ‘Down-Cut’ cuts from the surface down leaving a smooth edge at the surface.
3) Downcut Spiral Bits — Clean Top Edges
What it is / what it does
A downcut spiral pushes chips downward rather than pulling them up. That cutting action helps protect the top surface of the material, reducing fuzzing, tear-out, and edge chipping on the visible face.
Why it matters in signmaking
In many sign jobs, the top face is what the customer sees. If you are cutting wood signs, veneered panels, painted faces, plywood, or MDF where top-surface appearance matters, a downcut bit can make a big difference. Clean top edges often mean less sanding, less cleanup, and a more professional result right off the machine.
How to choose the best one for you
- Great choice when top-edge finish quality matters most
- Especially useful for wood, plywood, MDF, and finished sign faces
- Be aware that pushing chips downward can reduce chip evacuation in deeper cuts
- Works best when your setup, feeds, and dust collection support the cut
A downcut bit is often one of the most practical sign-shop bits because many signs are judged by how clean the visible edge looks. If you get fuzzy top edges with the wrong spiral direction, switching to a downcut is often the fix.
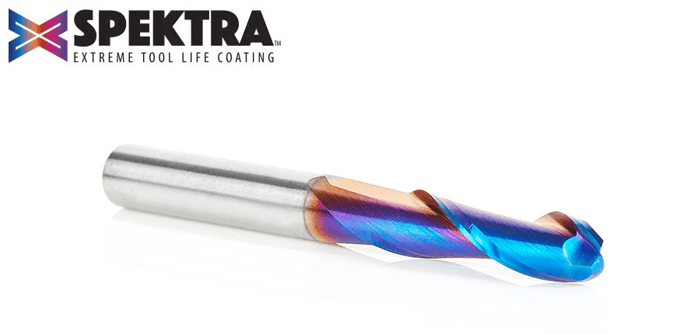 Amana Tool 46376-K SC Spektra Double Flute Up-Cut Ball Nose Spiral Router Bit - used for carving and sign manufacturing - leaves an excellent finish and expels chips quickly.
4) Upcut Spiral Bits — Roughing & Fast Material Removal
What it is / what it does
An upcut spiral pulls chips upward and away from the cut. This helps clear material efficiently, which can support cooler cutting, better chip evacuation, and more aggressive machining in the right setup.
Why it matters in signmaking
Upcut spirals are useful when speed and chip clearing matter more than top-surface perfection. They are often a strong choice for roughing operations, deeper slots, material removal, and jobs where you want to clear waste efficiently before a finishing pass.
How to choose the best one for you
- Use them when chip evacuation and material removal matter most
- Good for roughing passes and deeper cuts
- Make sure your workholding is solid, because upward cutting forces can try to lift the material
- Not always the best first choice for delicate finished top surfaces
Many sign shops use upcut bits as part of a process rather than as a one-bit solution. They can be excellent for roughing, but if top-edge appearance is critical, you may want a finishing strategy or a different bit geometry for the final pass.
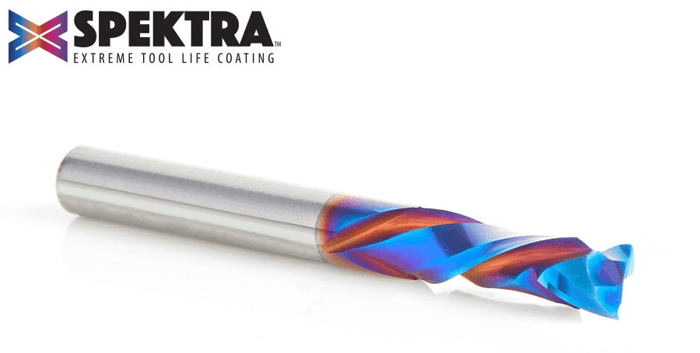 Amana Tool 46170-K CNC SC Spektra Compression Spiral 2 Flute Router Bit Designed for CNC applications requiring high feed rates and flawless compression cuts. Particularly suitable for double-sided melamine or laminated material.
5) Compression Bits — Laminated Materials
What it is / what it does
A compression bit combines upcut and downcut geometry in the same tool. The lower portion cuts upward, while the upper portion cuts downward. When used correctly, that combination can leave both the top and bottom edges cleaner than a standard upcut or downcut alone.
Why it matters in signmaking
If your shop cuts laminated panels, melamine, plywood, finished sign boards, or any material where both faces matter, compression bits are the right answer. They are popular because they can reduce tear-out on both sides of the cut—something that matters when signs need to look finished right off the CNC.
How to choose the best one for you
- Best for laminated materials and jobs where both faces need clean edges
- Pay attention to the compression zone and required cut depth
- If you do not cut deep enough for the bit’s geometry to engage properly, results may disappoint
- Excellent upgrade once your shop regularly processes sheet goods or finished panels
Compression bits are often where sign shops level up from “good enough” results to cleaner production output. If you frequently cut coated, laminated, or high-visibility sheet materials, this is often one of the smartest upgrades you can make.
 Amana Tool 51411-K CNC Spektra Spiral O Single Flute Plastic Cutting Router Bit originally developed in Europe specifically for professional sign makers.
 6) O-Flute Bits — Acrylic & Plastics
What it is / what it does
An O-flute bit is designed for plastics and similar materials, typically with a flute shape that helps eject chips cleanly and reduce heat buildup. That matters because plastics do not behave like wood: too much heat can melt the material, ruin the edge, and leave a poor finish.
Why it matters in signmaking
Acrylic signs, PVC signage, plastic letters, and other non-wood sign materials are common in many shops. O-flute bits are important because they help produce cleaner cuts in those materials and reduce the risk of melting, re-welding chips, or ugly edge quality.
How to choose the best one for you
- Use O-flute bits for acrylic, plastics, and similar sheet materials
- Pay attention to feeds, speeds, and chip load—the bit matters, but so does the setup
- If you regularly offer acrylic signage, this should move up your priority list
- Choose a size that matches the thickness of the materials and detail level you usually cut
If you have ever tried to cut acrylic with the wrong bit and ended up with melted edges or messy chips, you already know why O-flute geometry matters. It is one of those “right tool for the material” decisions that can save a lot of frustration.
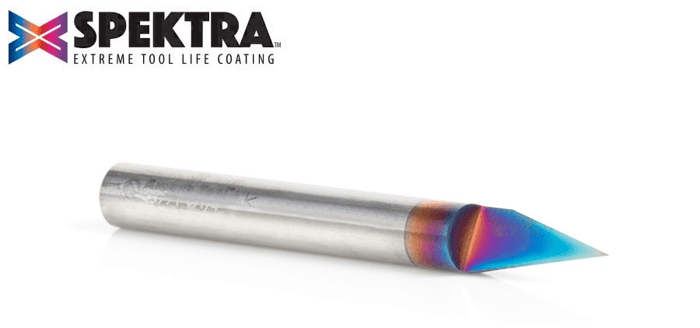 Amana Tool 45771-K Solid Carbide Spektra 30 Degree Engraving / Signmaking Router Bit For extra-fine carving and lettering details for signmaking.
7) Engraving Bits — Fine Detail
What it is / what it does
Engraving bits are designed for very fine cuts, delicate linework, and small lettering. They are often sharper, more detail-oriented tools than the broader V-bits used for larger carved signs.
Why it matters in signmaking
Some sign work demands precision: small text, logo details, nameplates, serial marks, decorative fine lines, or intricate fills. When ordinary V-bits are too large or too blunt for the job, engraving bits can produce cleaner, more refined detail.
How to choose the best one for you
- Choose engraving bits when detail is too fine for a standard V-bit
- Smaller tips can produce finer work, but they are also more fragile
- Think about your material, machine rigidity, and how often you cut tiny details
- Best for shops that offer premium customization, small lettering, or precision branding elements
Not every sign shop needs engraving bits immediately. But for the shops that do a lot of fine personalization, detailed logos, or premium close-up work, they can be a major quality upgrade.
Common Mistakes (Wrong Bit = Bad Results)
Many sign-quality problems come down to bit selection—not just feeds and speeds.
Using an upcut bit when the visible top edge must look perfect
Upcut spirals are great for clearing chips, but they can tear or fuzz the top face on some materials. If top-edge cleanliness matters, a downcut or compression bit may be the better choice.
Cutting laminated materials with the wrong spiral geometry
If you cut melamine, laminated board, or finished sheet goods with the wrong bit, chipping can show up on one or both faces. Compression bits are often the better fit for this kind of work.
Using a wood-cutting bit on acrylic or plastic
Plastic materials need the right geometry and the right cutting conditions. Using the wrong bit can lead to melting, poor chip evacuation, rough edges, and wasted material.
Choosing the wrong V-bit angle for the lettering size
A 90° V-bit may be great for larger carved letters, but it may be too broad-looking for small text. A 60° bit often gives better detail for smaller lettering and finer work.
Trying to do every job with one “general-purpose” bit
This is one of the most common beginner mistakes. A shop can get by with a small starter kit, but not every material and not every sign style should be cut with the same tool. The more your jobs diversify, the more your bit selection should match that reality.
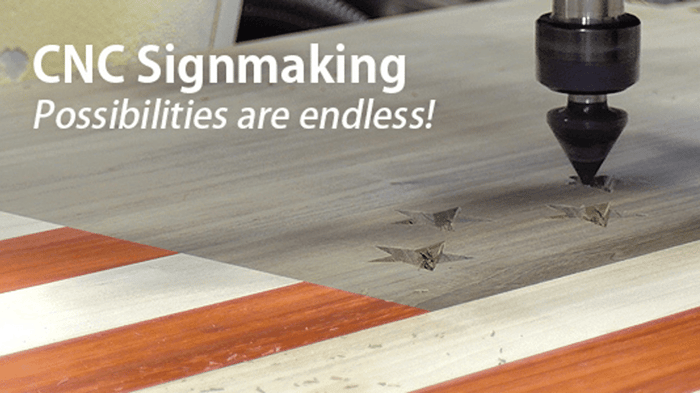
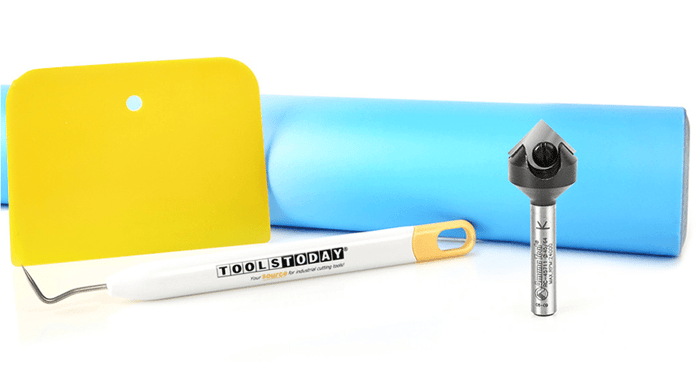 Just getting started with signmaking? The CNC Signmaking Essentials is the pack for you! It has everything you need to craft beautiful multi-colored signs without the need for a bunch of cleanup work! (As seen in the above video.)
Upgrade Path — Starter → Pro
You do not need to buy every bit at once. A smarter approach is to build your tool kit around the jobs you do most often, then expand as your materials and services expand.
Starter setup
- 90° V-bit
- 60° V-bit
- Downcut spiral
This is a strong starting point for carved letters, basic sign faces, and cleaner visible edges.
Working shop upgrade
- Add a compression bit for laminated materials and cleaner two-sided cuts
- Add an O-flute bit if you work with acrylic, PVC, or plastic signage
- Add an upcut spiral for faster roughing and better chip clearance where appropriate
At this point, you are better equipped for production variety and cleaner results across more materials.
Pro / premium sign shop setup
- Add ball nose bits for 3D carving and relief work
- Add engraving bits for very fine detail and premium customization
- Expand into multiple sizes within each category based on material thickness and sign style
This is where shops move from “we can make signs” to “we can make a wider range of signs well.”
When to upgrade
You are probably ready to expand your bit kit if:
- You keep getting the same edge-quality issue on a certain material
- You are turning down acrylic, laminate, or detailed carve work
- Your signs need too much cleanup after machining
- You want to offer higher-end dimensional or engraved signage
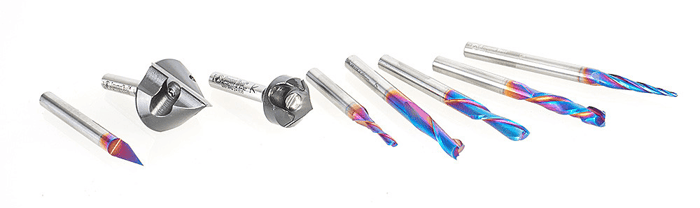
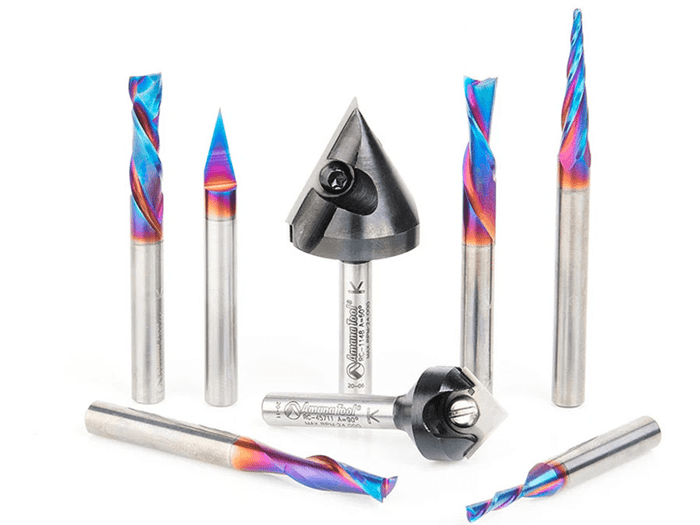 AMS-257 8-Pc General Purpose CNC Router Bit Set in Stackable Tanos Systainer Case - available with 1/4" or 6mm shank. For the most demanding signmaking, lettering and engraving tasks.
How to Choose the Best Bit for Your Shop
When choosing among these bit types, ask four simple questions:
1) What materials do you cut most often?
Wood, MDF, HDU, acrylic, PVC, laminated panels, and other sign materials all behave differently. The best bit for one may be the wrong bit for another.
2) What matters more: speed or finish quality?
Some bits are better for roughing and chip evacuation. Others are better for edge finish and visual quality. Know which one matters most for the job.
3) What kind of signs do you actually sell?
Flat text? Dimensional signs? Acrylic letters? Fine engraving? Relief carving? Your bit kit should reflect the work you do most—not every possible job you might someday take on.
4) How capable is your machine setup?
Bit choice also depends on spindle/router power, rigidity, workholding, and how reliably your CNC can run certain tools and cutting strategies. A more capable machine can usually take better advantage of a wider range of bit geometries.
Final Thoughts
The best CNC router bits for sign shops are not just the “best” in general—they are the ones that fit your materials, your machine, and the kind of signs you sell most often.
For many shops, the smartest first buys are a couple of V-bits, a downcut spiral, and then a compression bit or O-flute depending on material mix. From there, specialty bits like ball nose and engraving bits help you move into more premium, detailed, and profitable work.
Start with the bits that match your core jobs. Upgrade when your work demands it. And remember: in signmaking, cleaner cuts often begin with choosing the right geometry before you ever hit “Start.”
FAQs
What CNC router bit should I buy first for sign making?
Start with a 90° V-bit, a 60° V-bit, and a downcut spiral. That combination covers most lettering, carving, and clean edge work in wood and MDF.
What’s the difference between a 60° and 90° V-bit?
A 90° V-bit is better for larger, bolder lettering, while a 60° V-bit creates finer detail and works better for small text and intricate designs.
Why am I getting rough or fuzzy edges on my signs?
You’re likely using the wrong bit for the material or edge direction. Switching to a downcut bit for clean top edges—or a compression bit for laminates—usually fixes the problem.
What bit should I use for acrylic or plastic signs?
Use an O-flute bit. It’s designed to clear chips and reduce heat buildup, which helps prevent melting and leaves a cleaner edge.
Do I really need a compression bit?
If you cut plywood, melamine, or laminated sign boards, yes. Compression bits help keep both the top and bottom edges clean in a single pass.
Can I use one CNC bit for everything in my sign shop?
You can get by with a small starter set, but one bit won’t deliver the best results across all materials and sign types. Matching the bit to the job is key to clean, professional output.
When should I use an upcut vs. a downcut bit?
Use an upcut for fast material removal and better chip clearing. Use a downcut when the top surface needs to stay clean and free of tear-out.
What bit is best for detailed logos or very small text?
An engraving bit or a fine 60° V-bit works best for small lettering and detailed designs where precision matters.